Authors / metadata
DOI: 10.36205/trocar1.2023003
Abstract
To date the evaluation of the uterine cavity and of possible intra-uterine pathology is done through vaginal ultrasound, SIS/GIS (Saline infusion Sonography/Gel Infusion Sonography) imaging and through hysteroscopy. The main advantages of diagnostic hysteroscopy (with new generation small-diameter hysteroscopes) are a direct visualisation of the cervical canal and the uterine cavity and the possibility to perform targeted biopsies and even small surgical procedures in an office setting without using any type of anaesthesia or dilatation of the cervical canal.
This article focuses on the equipment and the technique of diagnostic hysteroscopy and how to take an endometrial biopsy.
Introduction
To date the evaluation of the uterine cavity and of possible intra-uterine pathology is done through vaginal ultrasound, SIS/GIS (Saline infusion Sonography/Gel Infusion Sonography) imaging and through hysteroscopy (1). To be able to actually ‘see’ inside the uterine cavity, and even perform targeted biopsies or small surgical procedures, we need specific equipment including a hysteroscope, a cold light source and fibreoptic light cable, a viewing system (with a camera control unit, a video camera and a monitor) for adequate vision and a system for uterine distension (2-6). Specific designed instruments will allow simple procedures – mainly biopsies – which will be addressed subsequently.
Equipment in diagnostic hysteroscopy
We will focus both on the delivery of distension media and on the most commonly used hysteroscopes.
Delivery of distension medium
In modern diagnostic hysteroscopy uterine distension is done using isotonic saline solution. Simple delivery using a syringe (of 50ml) or delivery using gravity with 3L bags 90 – 120cm above the uterus works perfect for simple diagnostic procedures. For small operative procedures in an office setting the slightly higher intra-uterine pressure can be obtained using a manually operated pressure-bag or using an electronic irrigation device/pump (4-6).
When using an electronic irrigation device it is possible to keep a constant pre-defined intra-uterine pressure and it is possible to readjust the different parameters related to the delivery of the distension medium (pressure, flow, suction) during the procedure if needed. When using an electronic irrigation device in a simple diagnostic hysteroscopy we set the pressure as low as 40 – 70mmHg. An intra-uterine pressure <70mmHg prevents passage of the distention medium into the peritoneal cavity and thus lowers the risk of vagal reaction or/and pain (9,10).
Hysteroscopes
Modern office hysteroscopy uses miniaturized hysteroscopes with a 2.0mm – 4.0mm diameter. Hysteroscopes are available in rigid, semirigid and flexible design and are available with a single-flow sheath or with a continuous-flow two-sheath design with working channel (4-6).
The high quality image transmission system in rigid hysteroscopes is based on the Hopkins optical system ie glass lenses alternating between air spaces. On the other hand the semirigid and flexible hysteroscopes are composed of thousands of optical fibres and a single lens at the distal tip. Rigid hysteroscopes are available with viewing angles of 0°, 12° or 30°.
Semirigid and flexible hysteroscopes do always have a 0° viewing angle (4-6). The hysteroscopes which are commonly used for office diagnostic (and operative) procedures – and that have inspired the world’s endoscope manufacturers – are the following:
- BETTOCCHI Operating Hysteroscopewith Continuous flow – Size 5 and Size 4(Karl Storz SE & Co.KG, Tuttlingen,Germany) (Fig. 1a – b)
The ‘Bettocchi Size 5’ has a 2.9mm scopewith 30° foroblique viewing angle and anouter diameter of 5mm. The ‘BettocchiSize 4’ has a 2.0mm scope with a 30°foroblique viewing angle and an outerdiameter of 4mm. Both hysteroscopesare available with two sheaths – one forinflow and the other for the outflow andwith a 5Fr working channel. Bothhysteroscopes have an oval shapedprofile that can be of help in introducingand advancing the hysteroscope throughthe cervical canal (2,4,5). - TROPHYscope – Campo CompactHysteroscope (Karl Storz SE & Co.KG,Tuttlingen, Germany) (Fig. 2)
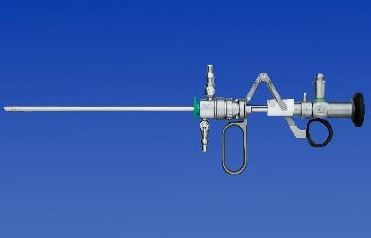
The Trophyscope has a 2.0mm scope with an integrated inflow channel (without any sheath) – the outer diameter is 2.9mm and thus very useful for pure diagnostic hysteroscopy. If necessary there are two types of outer sheaths that can be loaded onto the 2.9mm single-flow scope – a continuous-flow 3.7mm diameter sheath or a continuous-flow 4.4mm operating sheath with 5Fr working channel. These outer sheaths can be loaded onto the 2.9mm single-flow scope in an non-active position and can, if required, with a simple push on the button be switched to its active position (2,4). - GYNECARE VERSASCOPE HysteroscopySystem (Ethicon Inc., Johnson & Johnson,NJ, USA) (Fig. 3)
The Versascope system has 2components: a 1.8mm diameterreusable semi-flexible stainless steeltube containing 50.000 fibre optics and adisposable single use sheath. The sheathhas a expandable operating/outflowchannel up to 7Fr allowing the use of 5 -7Fr instruments for biopsies or operativeprocedures. The total outer diameter ofthe Versacope system is 3,5mm (2).
Miniaturized mechanical operating instruments
Miniaturization of mechanical instruments to the 5Fr dimension has made it possible to perform operative procedures during office hysteroscopy. They are introduced into the working channel of the operating hysteroscope and make it possible to perform biopsies, polypectomies, the retrieval of ‘lost’ IUD’s, the lysis of small adhesions and septa. The mechanical 5Fr instruments most commonly used are: the toothed grasping forceps (also called the alligator forceps), the pointed and the blunt scissors and the tenaculum grasping forceps (Hesseling forceps) (Fig. 4) (2,4,5).
Miniaturized bipolar electrodes
In 1997 a dedicated high-frequency bipolar generator called Versapoint (Gynecare, Ethicon) was launched to be connected not only to a bipolar loop for resection but also to the newly designed bipolar Versapoint electrodes known as the Twizzle, the Spring and the Ball electrode (Fig. 5). These disposable 5Fr bipolar electrodes can be introduced into the working channel of the operating hysteroscope and so do expand the range of surgeries that can be performed in an office setting. The Karl Storz Company (Germany) followed in 2005 with the development of miniaturized re-usable 5Fr bipolar electrodes (Fig. 6) (2,4,5).
Diagnostic hysteroscopy – the technique
No-touch or ‘vaginoscopic’ approach
The vaginoscopic technique, introduced by Stefano Bettocchi, makes it possible to approach the cervix and then the uterine cavity without a speculum and without a tenaculum. This reduces the anxiety of the patient and allows for maximal relaxation. The absence of the speculum allows greater maneuverability of the scope. This is an advantage when the uterus lies in an extreme anteversion or retroversion. Vaginoscopy is possible with a 0° scope but is easier with a 30° foroblique scope. The learning curve is rapid (3,6).
Without performing any disinfection, the hysteroscope is positioned at the introitus. The vagina is distended with saline solution and with the same pressure used for the uterine cavity (40 –70mmHg). The hysteroscope is then advancedposteriorly in the fornix posterior and then slowly backwards to locate the external os. Once this is correctly visible the tip of the scope is introduced into the cervix and, following the anatomy, gradually advanced further to reach the internal os and the cavity (3,6).
Intracervical advancement of the hysteroscope is potentially the most difficult part of the procedure. The key point is to avoid trauma to the fragile endocervical mucosa as this stimulates pain, can cause bleeding and poor view and can possibly predispose to false passage formation. Proceed slowly allowing the distension medium to open the cervix. When using a oval profile scope a 90° rotation of the instrument can adapt the scope to the major transverse axis of the internal os that appears oval. If synechiae or stenosis of the cervical canal are present use the alligator forceps or the scissors to free the passage instead of using force to overcome them (6).
After passing the internal os a few seconds wait will be sufficient to obtain the distension of the uterine cavity. Proceed from the internal os upward following the axis of the uterine body and avoid touching the uterine wall. It is essential to let the distension medium wash the uterine cavity so to identify the uterine landmarks – fundus, cornua and tubal ostia, anterior, posterior and lateral walls. The 30° optic allows easy visualization of all the uterine walls by rotating the optic gently on its axis to the right and to the left. On the contrary, the same vision with a 0° optic is possible only by moving the entire instrument to the right or to the left with lateral movements resulting in more discomfort for the patient (6).
After a general structural assessment attention should be drawn to focal lesions (polyps, fibroids, adhesions, adenomyosis), to congenital anomalies and to the endometrium. Hysteroscopic evaluation of the endometrium can be done with the hysteroscope at a small distance (1-2mm) to evaluate the surface, color, glandular openings and superficial vessel pattern.
Once inspection of the uterine cavity has been completed, the hysteroscope is slowly withdrawn into the cervical canal which can be inspected again (6).
How to take an endometrial biopsy?
One of the main advantages of office hysteroscopy is the possibility to perform targeted biopsies under direct visualization. The three most common techniques to perform a targeted biopsy sampling are the following (2,7,8):
- the Punch biopsy: uses a spoon biopsyforceps to biopsy the endometrium. Themain disadvantage is the small, often notrepresentative biopsy sample.
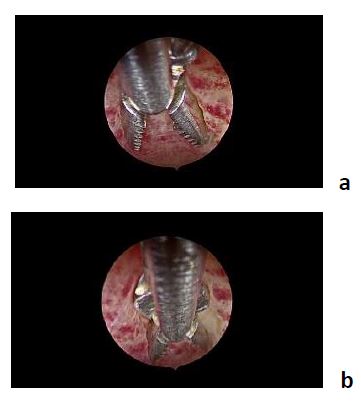
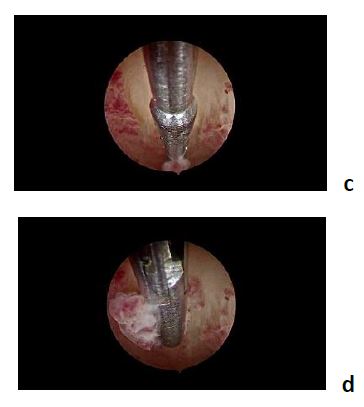
- the Grasp biopsy (Fig. 7): uses the toothedgrasping forceps (alligator forceps). Thegrasp biopsy technique is preferred over thepunch biopsy technique as it permitsremoval of larger portions of tissue. This ispossible because of the length of the toothedjaws that are double in length in comparisonwith the jaws of the spoon biopsy forcepsand the application of a specific grasptechnique. The alligator forceps is positionedwith the jaws open at the level of theendometrium. With open jaws the forceps isadvanced (plowed) across the tissue forabout 1-2 cm. At this point the jaws areclosed again and the biopsy is grasped. Theretrieval of the biopsy from the uterine cavityis done – together with the entirehysteroscope – without retracting the tip ofthe forceps into the operating channel of thehysteroscope.
- the Cutting biopsy: uses a hysteroscopicscissors or a bipolar 5Fr electrode tocut/individualise an endometrial area. Theretrieval of this (larger) biopsy has to be donethrough the alligator forceps or by thetenaculum grasping forceps.
In 2019 Vitale did propose another grasper for taking endometrial biopsies: the Biopsy Snake Grasper (12). It is a robust, easy-to-use grasper with a central serrated tip and 2 sharp-edged jaws that completely encompass the tip when they are clenched. It can be used through all 5 Fr working channels
Recent advances in miniaturization of hysteroscopic equipment have yet resulted in the availability of mini-resectoscopes (Fig. 9) and of small-diameter ‘tissue removal systems’ (Fig. 10).
Probably in the near future these new hysteroscopic small-diameter tools will enable us to perform diagnostic hysteroscopy followed by extensive biopsy sampling and a one-step treatment of larger intra-uterine pathology outside of the operation room without anesthesia and with little or no dilatation (2,11).
Conclusion
Numerous technical innovations, in particular the development of small-diameter hysteroscopes equipped with a working channel, allow not only evaluation of the cervical canal and the uterine cavity but also to perform biopsies and to treat intra-uterine pathology without anesthesia in an outpatient setting.
References
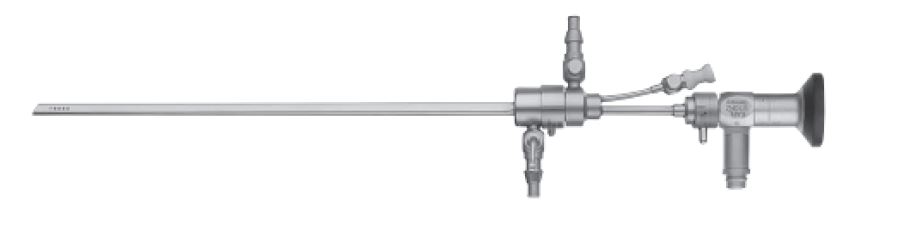
Fig. 1a Bettocchi continuous-flow Operating Hysteroscope – Size 5
(Karl Storz SE & Co.KG, Tuttlingen, Germany)
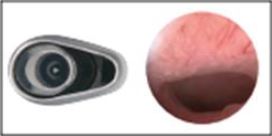
Fig. 1b Bettocchi continuous-flow Operating Hysteroscope – oval shape (Karl Storz SE & Co.KG, Tuttlingen, Germany)
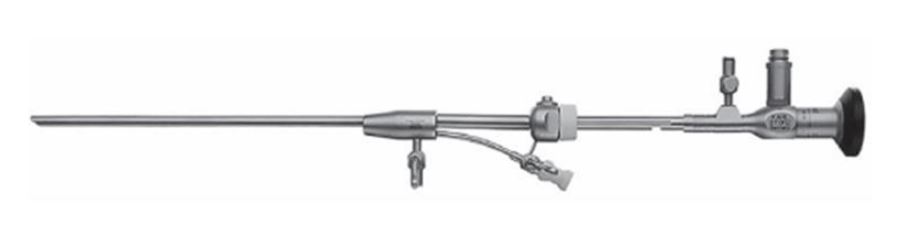
Fig. 2 Campo Trophyscope (Karl Storz SE & Co.KG, Tuttlingen, Germany)
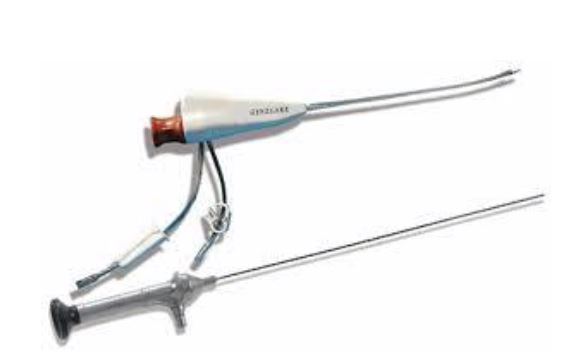
Fig. 3 Gynecare Versa scope Hysteroscopy System (Ethicon Inc., Johnson & Johnson, NJ, USA)
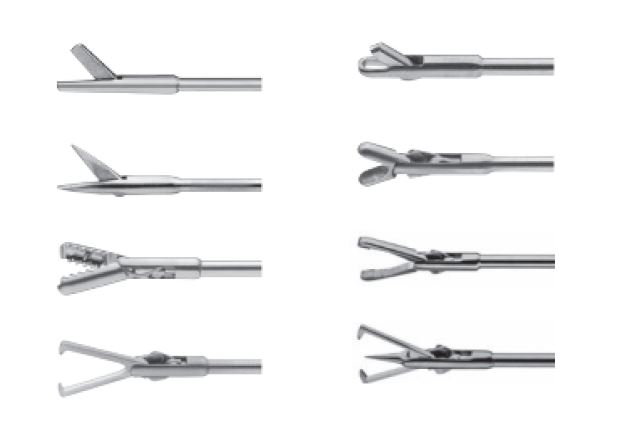
Fig. 4 5Fr mechanical operating instruments (Karl Storz SE & Co.KG, Tuttlingen, Germany)

Fig. 5 disposable bipolar 5Fr Versa point electrodes (Gynecare Ethicon Inc., Johnson & Johnson, NJ, USA)

Fig. 6 re-usable bipolar 5Fr electrodes (Karl Storz SE & Co.KG, Tuttlingen, Germany)
the forceps is positioned with jaws open / the forceps is advanced with open jaws for about 1 – 2cm
the jaws are closed again and the biopsy is grasped / Retrieval is done together with the entire hysteroscope
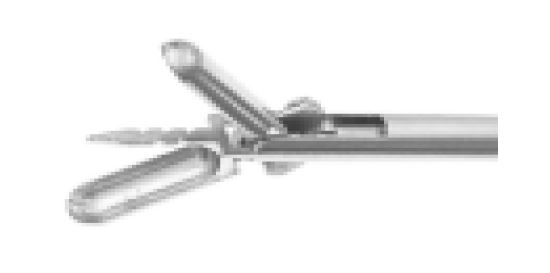
Fig. 8: ‘the Biopsy Snake Grasper’
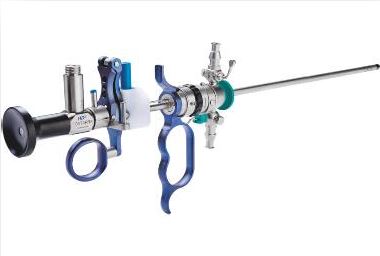
Fig. 9 mini-resectoscopes Gubbini Ellipse System 14,9Fr (Tontarra Gmbh – Germany).
15Fr min resectoscope (Karl Storz SE & Co.KG, Tuttlingen, Germany)
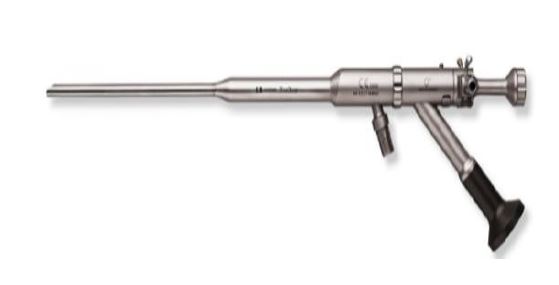
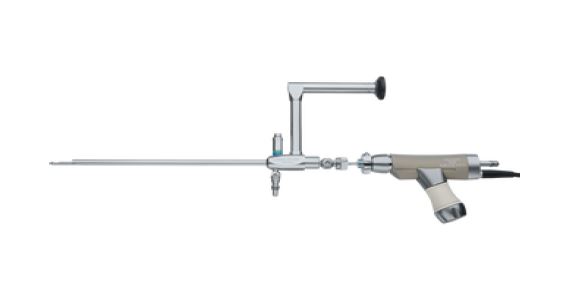
Fig. 10 small-diameter ‘tissue removal systems’ Truclear ® Elite mini hysteroscope (5,7mm) (Medtronic)
19 Fr Intrauterine Bigatti Shaver (Karl Storz SE & Co.KG, Tuttlingen, Germany)


